
/* Expandable post summary: */ Queer Vegan Kitchen: Ashley
Showing posts with label Ashley. Show all posts

Sunday, September 26, 2010

Dango

I am consumed by visions of dumplings; the idea of something small, doughy, and a bit warm is absolutely the most comforting thought I can manage. It is like home, but tastier. If you're wondering what a dango (dahn-goh) is, they're little rice dumplings on skewers that look like this:


Except without the unnecessarily huge eyes; though I do think they seem uncannily friendly, but perhaps its just that they're balls. Read Wikipedia if you'd like to know more.

More...The dango themselves are very simple, you will need only:
  • 1lb Glutinous or Sweet rice flour
  • 1lb Silken Tofu (someone found a lot of the Mori Nu stuff in a dumpster)
  • a few tablespoons of water
Then there's a series of toppings! Specifically, I chose black sesame, kinako (toasted soy flour), peanut, and soy syrup. Their ingredients are grouped below:
  • 4 tbsp black sesame seeds
  • 2 tbsp sugar
  • 4 tbsp kinako
  • 2 tbsp sugar
  • 1 1/2 cups flour
  • 1 tbsp sugar
  • a small pinch of salt (a scant 1/4 tsp)
  • 2 tbsp soy sauce
  • 2 tbsp wine or mirin
  • 2 tbsp sugar
(Yields approximately 14 skewers)
Here's everything:


First, you'll want to prepare the toppings. For the peanut, you can buy them pre-roasted, but what's the fun in that? Neila was peanut coordinator and peanut gallery for our dango operation.
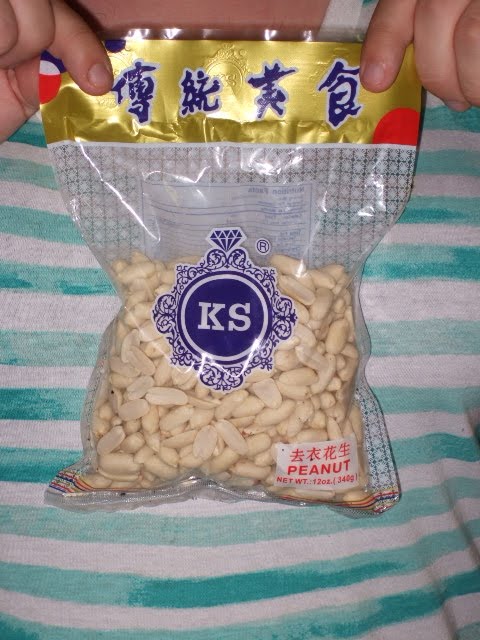


Preheat an oven to 500°, then simply spread them on a cookie sheet, and toss them in the oven for 5 minutes, stir them, and then send them in again. It is advisable to roast more than a cup and a half, because they're rather tasty and it's difficult to avoid eating them. When its all said and done they look like this:


"Discard" (eat) any peanuts that are a little too brown, and grind the rest coarsely in a blender or food processor with the salt and sugar, and dump them on a plate or a pie tin, so that it will be easy to roll dumplings therein.


For the sesame seeds, simply grind them coarsely with a pestle or in a coffee grinder, like so:


You want a consistency like coarse sand. Mix the sesame meal with its sugar on another plate or pie tin.

The kinako comes pre-pulverulent, so you can mix it with its sugar straight away.


There is a traditional type of syrup dango called mitarashi dango, which are flame grilled and so called because they are eaten at the Mitarashi Festival in Kyoto. I didn't get any mirin (cooking rice wine) at the Asian imports store, so I improvised with a bit of red wine, which made these not-so-traditional-but-still-quite-delicious syrup dango.

Stir together the soy sauce, wine or mirin, and sugar in a small sauce pot, and whisk over medium heat until it bubbles like this:


Reduce heat to simmer, and continue cooking for five more minutes or until thick, stirring often. If it seems like it is getting close to burning you can just take it off the burner for a second, but make sure it thickens.

Now to the fun part: dango making. Drain the tofu, and combine it with rice flour with your hands until it looks like this:


Start adding water, a teaspoon at a time, until the mixture forms a stiff dough. When you see it cracking, like this:


You need to add more water. Continue adding water (it shouldn't be much more than six teaspoons) until the mixture is easily malleable and does not crack. You should be able to form it into a creepy alien baby, like this:


You can see it is still cracking a bit, so I added another teaspoon or two of water. If you wanted your dango to be pink you can add strawberry preserves or puree instead of water, for green ones, prepared, sweetened matcha (the drink not just the powder) is great.

Forming the balls is a bit of a trick, but start by squishing a small bit of dough (about two tablespoons) into a rough patty shape thus:


then rolling it into a smooth ball, thus:


Smooth balls are important, because smoothness effects their mouth feel, and unless you're covering them with something opaque, people will notice your inattention to detail. Irregular balls are also more likely to come apart when cooking.

Boil the dumplings. They'll start to float like this:


Continue cooking for about three minutes more and immerse them immediately in ice water.

Set them in the tray of the topping of your choice and spoon the topping mixture on to them, you may have to roll a bit to coat, but if you get the powders to wet they tend to clump, so keep rolling to a minimum, because clumps are not tasty.


Once you get three dango coated, gently skewer them, like so:
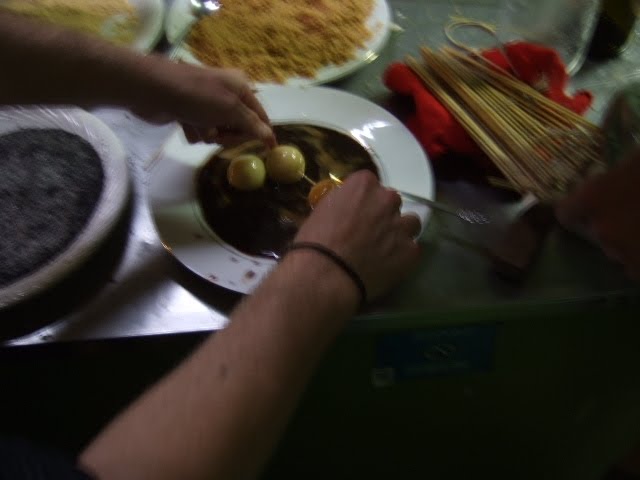


With the last one you want to push the skewer almost (but not quite) all the way through, so it looks like this:


From here the skewers can be transfered to a serving plate or stored in the fridge for about a week. They are better fresh, and I recommend let them warm to room temperature for a bit before you serve them.


Nate and his beard Carlisle agreed to pose with the dango.


So good it must be wrong.

Before I leave you, take a moment to consider the dango as a symbol. The beloved poet Issa (whose pseudonym means roughly "one cup of tea") wrote a great many poems mentioning dango, and he wrote praise for the dango as simple as the dumpling itself, apropos of a sweet that goes so well with tea:


Truth be told,
I prefer, rather than blossoms,
dango

While this translation hardly does it justice, this poem, to me, is about impermanence. Dango and blossoms (some dango are traditional for blossom viewing festivals) are both impermanent, and Issa uses a Japanese idiom, "hana yori dango" which stresses the importance of practical things over frivolous beauty. Dumplings satisfy us in a way that aesthetics cannot, and even we, in the end, are impermanent. I ask that you take this lesson from the dango, abandon your attachment to superficiality, and find instead what nourishes you deeply.

Especially if that involves balls in your mouth.

Next week the testicle puns and dumpling shenanigans continue with Matzo Ball Soup!

Tuesday, June 22, 2010

Jalapeño Bagels

Bagels are the most rewarding toroidal pastry. I'm not here to bad-mouth doughnuts, but I think they have received far too much attention; as evidenced by the Torus article on Wikipedia failing to mention bagels even once. This is a travesty! Keep a look out for the Facebook group to end Wikipedia's bagel discrimination (Bagels Are Toroids Too So Halt Internet Tacitness (BATTSHIT), or Toroidal Inclusiveness Coalition(TIC)). Of course anyone can edit Wikipedia, but why miss an opportunity form another Facebook group, and protest a bit?

There is a reason that most people don't make bagels themselves though, it is a tremendous undertaking and bagels of reasonable quality are available from bakeries (most supermarket bagels are wite-brehd™ rolls with holes in). However, if you are willing to work a bit, these bagels will reward your effort with interest.


More...

You will need some non-food stuff:
  • flat, smooth work area on which to shape and proof bagels
  • stock pot for boiling the bagels
  • two smallish mixing bowls for liquid and dry ingredients
  • one small bowl for mixing oil with jalepeños
  • flat pan or cookie sheet for baking bagels
  • A standing mixer, or a very large bowl.
You may also want:
  • a kitchen scale
  • cooling racks
  • big knife for dough surgery
  • victims, er assistants
The Bagels are made of:
  • 3 oz oil
  • 1 1/2 cups water VERY WARM (and maybe a little more)
  • 2 TB sugar
  • 2 tsp salt
  • 1 TB active dry yeast (a little more than a packet of instant yeast)
  • 22 oz flour(about 5 cups)
You may also want:
  • 1 tsp tumeric
  • 4-5 jalapeños
First you make a yeast slurry. Combine VERY WARM water, sugar, salt and yeast:


Mine were very excited right away, but its best to give them about ten minutes to warm up and get multiplying. Let your slurry hang out somewhere warm for about 10 minutes while you assemble your other ingredients.

Weigh out the flour:


Add it to your standing mixer (or large bowl):


Most of the "heat" from the jalapeño, like most peppers, comes from the white picante (placenta) surrounding the seeds; if you want spicey bagels you can leave it in, but I prefer my bagels mild. If you want more detail on how to remove this and slice the peppers you can see the step by step photo in my Gyoza post.


Dice 'em and mix 'em with your three oz of oil. If you want the color, now is a good time to add the turmeric. I tripled the recipe, but it should look more or less like this.


By this time your slurry should be foaming like crazy:


If you're using a standing mixer, dump the wet ingredients on top. If you've just got a mixing bowl, you should mix your wet stuff first.


Start on the lowest speed.


Until it comes together, like the picture below, then crank it up to medium.


Let that it rattle for at least 15-20 minutes. If you're using your hands this much kneading will take a really long time. I recommend kneading it until you're exhausted, then resting for 1o minutes, and repeating the process. It should look like this when its all done:


Shape it into a nice brain (I tripled the recipe to make 3 dozen, so don't be frightened if your brain is smaller).


Tuck it into an oiled bowel or some such vessel, keep it in a nice warm place (like an oven with a pilot light, or a couch with a bunch of cuddling people) cover it with a damp towel or tee-shirt, and let it sit for an hour.


'Til it looks like this:


Punch it down, which despite the name and the way this picture looks, just means pressing down gently and folding a bit until the bigger bubbles have gone.


Slice it into quarters, and then slice those into thirds.


Definitely use a cutting board though, that last picture is silly; I could have dulled the knife. You'll be reusing the t-shirt to cover all of your cute little pieces, to see that they don't dry out.


Then you have to do this thing with rolling and folding, here just watch this video. Put a large pot of liberally salted water on to boil, and let them chill out for another ten or twenty minutes under that tee-shirt, and they look like this:


Preheat the oven to 450°, then boil the little darlings, for about a minute on each side.


Place them on a flat surface, no cooling racks unless you want your bagels to have sweet grill marks. These bagels are not the innocent dough rounds they once were, they're grayer, emptier, and tempered by the relentless boil.


I love the color change with the turmeric here; especially on the bluish steel background. It reminds me of that one movie. You know the one, with the underground sparring society? I don't remember.


Now clearly these are flour dough balls that have been cooked in water, so let us pause for a moment to consider an important question: Is the bagel a dumpling? I think so, and I'm tired of bagel exclusion, and therefore I propose Bagel UNity with Toroids and Dumplings (BUNDT), Coalition Against Bagel Linguistic Exclusion (CABLE) or Bagel Advocacy and Support Society (BASS) to take action against the bagel's categorical disenfranchisement on Wikipedia and the world at large. If your wondering why I haven't posted in awhile, its because it takes a long time to come up with acronyms.

Now you bake them at 450° for 10 minutes and flip them. They should look like this when you put them back in the oven for 10 more minutes.


Remove them quickly to a cooling rack and try to resist eating them for 10 minutes so they will be solid enough to stand up to slicing.


(Note the sweet grill marks in the above photo) That is one fine looking whole wheat jalapeño bagel.


They stand up pretty well to those bagel-slicing guillotines, but you may just want to tear into them with teeth bared, à la this weeks Guest Mouth, Ashley:


Ah-hem, punk rock.
Happy baking y'all; remember to keep your kitchen queer. Next week Dango!