/* Expandable post summary: */ Queer Vegan Kitchen: Neila
Showing posts with label Neila. Show all posts

Sunday, October 3, 2010

Matzoh Ball Soup

Matzoh ball soup is good for what ails ya, or, for that matter, what doesn't ail ya. Vegetable broth is warm, full of the distilled essence of its constituent vegetables, and easy to eat with a sore throat or indigestion. Matzoh ball soup is vegetable broth + dumplings; further reinforcing my theory that dumplings improve everything.


As I've said before, I am filled up with visions of dumplings, Professor Matzoh (above) is one such vision. Sometimes he has adventures, like adding a couple of chili peppers to the vegetable broth; this is very exciting if you're a matzoh ball (or me).
More...

It's a long time 'til passover, but I think this is a good recipe to have on hand for flu season. Also, the matzoh balls have tofu which, depending on who you ask, is not kosher for passover.This is definitely an autumnal vegetable broth, and near passover I like to put leeks and parsnips and springtime veggies into my broth. Above all, use what is in season, and if you don't know what's in season, just go to the farmer's market. Vegetable broth is very forgiving; I accidentally bought a watermelon daikon with my rutabagas and it still turned out lovely.

Autumn Vegetable Broth Requires:
  • 3-4 Rutabagas, chopped
  • 2-3 Carrots, chopped
  • 2-3 Ribs of Celery, chopped (chop up the leafy stuff too)
  • 4-10 cloves garlic, minced fine (to taste)
  • 2 medium onions, chopped large
  • 2 small chili peppers, diced small (optional)
  • Some fresh dill, to taste (dry is fine, but it's strong so be careful)
  • Olive Oil
  • Salt and Pepper
  • A bay leaf or two
  • 8 cups water
The matzoh ball recipe I adapted from the Post Punk Kitchen, but their recipe always frustrated me because you can only get about two cups of matzoh from a box of matzoh crakers, so I reduced it proportionally, and added beer. Why beer? Because I'm from the Pacific Northwest and we have great beer; also, beer is good for what ails you. Recipe doubles.
  • 1/2 box Matzoh Crackers ground into Course Matzoh Meal (about 1 cup)
  • 3/4 Package of Silken Tofu
  • 1/4 cup Oil
  • 1/4 cup + 2 tbs Beer (pour a half cup and take a swig or two, you can also use vegetable broth)
  • 3/4 tsp each salt and pepper
  • a little dill
I know it just leaves you with leftover tofu instead of left over matzo, but I use tofu for dips and things, and the recipe doubles more easily.

First get your vegetable broth going. Here's my mis en place with my stylish Sundance Natural Foods tote:


I peeled everything, which is unusual for me, but I think root vegetable and onion skins bitter the broth. They are full of nutrients though, so it is your call.

Add a good bit of olive oil to a very large stock pot and heat it over medium. When it is hot, saute your vegetables starting with the slower cooking veggies (onions) and moving to the quick cooking stuff (celery tops, garlic, and peppers). Salt liberally throughout the process.


When the veggies start to show signs of browning, its time to add your water. Toss in your bay, more salt, and pepper, and bring that mess to a rolling boil, then drop the heat down to a simmer. It will need to simmer for 2-3 hours, so in the meantime you can get your matzah balls ready. Here's the essentials (minus the beer).


First, crumble the matzoh into a food processor. You can also do this part by hand, but the food processor is much faster.


You want a meal that is mostly very fine, but still has a few bigger bits about the size pictured below. Variation is good because the finer meal is good for structure and the coarser meal is better for texture.


Empty the food processor into a bowl and stir the salt, pepper, and dill into the matzah meal.

Now it is time for the wet mix; drain your tofu, add it to the food processor or blender and puree until it's very smooth.


Add your oil, and beer or broth. It looks neat:


Puree again, then add that business to the matzoh meal. Mix well with a wooden spoon or rubber spatula.


Eventually you'll have to use your hands. Massage it until it is consistent; it will be quite firm.


So firm in fact that you can form it into a creepy matzah baby. Isn't it cute... or something?


Cover with a wet towel or plastic wrap and keep it in the fridge for 1 hour. Your vegetable broth should be progressing nicely now, so give it a taste and see if it needs salt. You could also add some tamari if you were feeling bold. I'd hold off on the fresh dill until the very end though; dill looses its fresh taste if it is over cooked.

After your hour is up, start rolling quarter-sized balls of matzoh dough. I feel like matzoh balls shouldn't take more than two bites, but ball size is a matter of personal taste.


Smoothness is futile with a matzoh ball, but it is critical that the ball have no visible cracks, is well compacted, and is roughly round; this will ensure even cooking, with minimal breakage. Here's a detail shot of what your after:


Those larger crumbs are a critical part of the finished texture. If you make quarter-sized balls, you should wind up with approximately 18 dumplings, which means that if you double the recipe you get a perfect square of 36 balls:


I like to let my balls hang out for another 10-20 minutes so the outside dries a little, which I think helps them to hold their final shape. This is just enough time to strain your vegetable broth.


The cooking process really brought out the pink of the watermelon daikon, and you can see a big piece right in the center. You could potentially boil your vegetable broth for six hours, but I like to have some vegetables with a bit of flavor left over so I can mash 'em and get in on some of that lost fiber!

In a large stock pot, bring 8-10 cups of water to a boil, and salt it liberally. Like a handful of salt. I'm serious. Add the dumpling dough-balls thus:


Boil 'em 'til they float, then boil 'em ten minutes more. Meanwhile, heat your freshly strained vegetable broth, and toss in some chopped fresh dill. Dill is strong, so be gentle. With a slotted spoon move the matzoh balls into the vegetable broth. They'll float for a minute, but unless you serve it immediately you'll need a ladle for broth and a slotted spoon to fish out dumplings.


A bit more fresh dill and some grated carrot are a nice garnish, but I didn't bother. This soup is so good, so simple, and so nourishing. Here's some bowls made up:


You may have noticed that I used alot of different spellings for matzah (מַצָּה), and I chose to do so because there are about 7 accepted spellings; this means, in tern that the only real way to spell matze incorrectly, apart from leaving off a "t" or other such typographical slips, is to be stylistically inconsistent. So you can think of my many spellings as a sign of respect to each of them for their individual merits, or as a "fuck you" to style guidelines that tell me I have to pick just one. I hate having to pick just one.

Some time in your life, a loved one will fall ill. If you have mastered vegetable broth, you will for a short time be able to make them feel better. And you will feel better. So learn now, before the winter illnesses take you too.

Abel volunteered to be my Guestmouth this week, and confirmed that the soup was deeply warming:


In the 5th century BCE, the Greek philosopher and physician Hippocrates said "Everyone has a doctor in him or her; we just have to help it in its work. The natural healing force within each one of us is the greatest force in getting well. Our food should be our medicine. Our medicine should be our food." It is this sense of feeling nurtured and whole to which I refer when I say that matzo ball soup is a panacea. I hope you will try my soup, and be nourished by my balls.

Next week the dumpling mania continues with Steamed Buns! Remember to keep your kitchen queer.

Sunday, September 26, 2010

Dango

I am consumed by visions of dumplings; the idea of something small, doughy, and a bit warm is absolutely the most comforting thought I can manage. It is like home, but tastier. If you're wondering what a dango (dahn-goh) is, they're little rice dumplings on skewers that look like this:


Except without the unnecessarily huge eyes; though I do think they seem uncannily friendly, but perhaps its just that they're balls. Read Wikipedia if you'd like to know more.

More...The dango themselves are very simple, you will need only:
  • 1lb Glutinous or Sweet rice flour
  • 1lb Silken Tofu (someone found a lot of the Mori Nu stuff in a dumpster)
  • a few tablespoons of water
Then there's a series of toppings! Specifically, I chose black sesame, kinako (toasted soy flour), peanut, and soy syrup. Their ingredients are grouped below:
  • 4 tbsp black sesame seeds
  • 2 tbsp sugar
  • 4 tbsp kinako
  • 2 tbsp sugar
  • 1 1/2 cups flour
  • 1 tbsp sugar
  • a small pinch of salt (a scant 1/4 tsp)
  • 2 tbsp soy sauce
  • 2 tbsp wine or mirin
  • 2 tbsp sugar
(Yields approximately 14 skewers)
Here's everything:


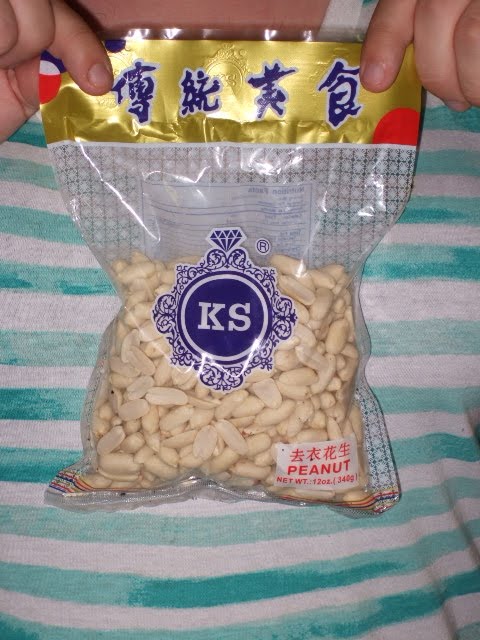
First, you'll want to prepare the toppings. For the peanut, you can buy them pre-roasted, but what's the fun in that? Neila was peanut coordinator and peanut gallery for our dango operation.


Preheat an oven to 500°, then simply spread them on a cookie sheet, and toss them in the oven for 5 minutes, stir them, and then send them in again. It is advisable to roast more than a cup and a half, because they're rather tasty and it's difficult to avoid eating them. When its all said and done they look like this:


"Discard" (eat) any peanuts that are a little too brown, and grind the rest coarsely in a blender or food processor with the salt and sugar, and dump them on a plate or a pie tin, so that it will be easy to roll dumplings therein.


For the sesame seeds, simply grind them coarsely with a pestle or in a coffee grinder, like so:


You want a consistency like coarse sand. Mix the sesame meal with its sugar on another plate or pie tin.

The kinako comes pre-pulverulent, so you can mix it with its sugar straight away.


There is a traditional type of syrup dango called mitarashi dango, which are flame grilled and so called because they are eaten at the Mitarashi Festival in Kyoto. I didn't get any mirin (cooking rice wine) at the Asian imports store, so I improvised with a bit of red wine, which made these not-so-traditional-but-still-quite-delicious syrup dango.

Stir together the soy sauce, wine or mirin, and sugar in a small sauce pot, and whisk over medium heat until it bubbles like this:


Reduce heat to simmer, and continue cooking for five more minutes or until thick, stirring often. If it seems like it is getting close to burning you can just take it off the burner for a second, but make sure it thickens.

Now to the fun part: dango making. Drain the tofu, and combine it with rice flour with your hands until it looks like this:


Start adding water, a teaspoon at a time, until the mixture forms a stiff dough. When you see it cracking, like this:


You need to add more water. Continue adding water (it shouldn't be much more than six teaspoons) until the mixture is easily malleable and does not crack. You should be able to form it into a creepy alien baby, like this:


You can see it is still cracking a bit, so I added another teaspoon or two of water. If you wanted your dango to be pink you can add strawberry preserves or puree instead of water, for green ones, prepared, sweetened matcha (the drink not just the powder) is great.

Forming the balls is a bit of a trick, but start by squishing a small bit of dough (about two tablespoons) into a rough patty shape thus:


then rolling it into a smooth ball, thus:


Smooth balls are important, because smoothness effects their mouth feel, and unless you're covering them with something opaque, people will notice your inattention to detail. Irregular balls are also more likely to come apart when cooking.

Boil the dumplings. They'll start to float like this:


Continue cooking for about three minutes more and immerse them immediately in ice water.

Set them in the tray of the topping of your choice and spoon the topping mixture on to them, you may have to roll a bit to coat, but if you get the powders to wet they tend to clump, so keep rolling to a minimum, because clumps are not tasty.


Once you get three dango coated, gently skewer them, like so:


With the last one you want to push the skewer almost (but not quite) all the way through, so it looks like this:


From here the skewers can be transfered to a serving plate or stored in the fridge for about a week. They are better fresh, and I recommend let them warm to room temperature for a bit before you serve them.


Nate and his beard Carlisle agreed to pose with the dango.


So good it must be wrong.

Before I leave you, take a moment to consider the dango as a symbol. The beloved poet Issa (whose pseudonym means roughly "one cup of tea") wrote a great many poems mentioning dango, and he wrote praise for the dango as simple as the dumpling itself, apropos of a sweet that goes so well with tea:


Truth be told,
I prefer, rather than blossoms,
dango

While this translation hardly does it justice, this poem, to me, is about impermanence. Dango and blossoms (some dango are traditional for blossom viewing festivals) are both impermanent, and Issa uses a Japanese idiom, "hana yori dango" which stresses the importance of practical things over frivolous beauty. Dumplings satisfy us in a way that aesthetics cannot, and even we, in the end, are impermanent. I ask that you take this lesson from the dango, abandon your attachment to superficiality, and find instead what nourishes you deeply.

Especially if that involves balls in your mouth.

Next week the testicle puns and dumpling shenanigans continue with Matzo Ball Soup!

Sunday, December 13, 2009

FEAST

I am disgusted that we annually minimize the continuing genocide against indigenous people with a celebratory feast that slaughters literally millions of turkeys (the National Turkey Federation estimates that 45 million were killed in the 2009 thanksgiving season alone). The myth of Thanksgiving is, by design, a tool to justify early European imperialism in North America, and excuse its atrocities.

I did, however, have a feast on thanksgiving day; it was delicious and considering that everyone there understood the implications of the holiday, an all vegan thanksgiving was kind of subversive. Now that its been a month and finals are over, I'mma finally post the photos.


Our theme was things shaped like other things. We had a full spread:
Cock Roast (made the night before, reheated the day of the Feast)
Sour Dough Stuffing (prepped the night before, baked the day of)
Mashed 'Tater Casserole (prepped the night before, baked the day of)
Rainbow Chard (day of)
Heart Biscuits (night before, reheated with roast)
Gravy (day of)
Cranberry Sauce (day of)
PIE! not pictured above; it'll get its own entry later

Recipes down here
More...
Hmmm... that thing in the middle looks kind of like a...


Cock-Roast (AKA Seitan's Penis)!
This does require a novelty penis pan, but I discovered that the recipe fit into one that was just lying around my co-op. I fudged a recipe from Bryanna's Vegan Feasts, it takes awhile so it might be a good idea to prepare it the day before your feast.

You will need:
2 c.gluten flour
1/2 c. bean flour (I blend about 2/3 a cup red lentils in my blender until it is a very fine powder, but you can use soy or chickpea(besan) flour with good results)
1/2 c. nutritional yeast flakes
2 tsp. onion powder
2 tsp. garlic granules (or more)
1tsp. pepper
12 oz. firm tofu (if you can't do soy 1 cup of cooked, mashed beans will work)
1 and 1/2 c. water
3 T. soy sauce (a little salt water, marmite dissolved in a bit of water, or diluted vegan Worcestershire sauce all work fine)
1 T. olive oil
  1. In a blender or food processor blend your tofu (or whatever) with the other wet ingredients until very smooth. I use a little more oil than a Tablespoon of oil and I think it gives the roast more character.
  2. Mix the dry ingredients well in a large bowl, or standing mixer with a dough hook.
  3. Add in the dry ingredients and mix until a dough-ball forms. Let it rest for about ten minutes.
  4. Knead for about 10 minutes, let it rest for a bit, then knead for another ten minutes. This is a lot of work to do by hand, but it pays off in the roasts texture.

  5. Let it rest for about an hour and prepare a basting broth

  6. Basting Broth (you can eyeball the spices, but be sparing with turmeric):
    2 cups hot water
    1/4 cup nutritional yeast flakes
    1/2 Tbs onion powder
    1/2 Tbs sea salt
    1 tsp sweetener (I use sucranat you can use maple syrup, but use the real stuff and maybe a tablespoon
    1 tsp garlic granules or powder
    1/2 tsp black pepper
    1/2 tsp dried thyme
    1/2 tsp finely crumbled dried sage (less if it's powder)
    1/2 tsp oregano
    1/2 tsp paprika
    1/2 tsp turmeric
    2 T. olive oil
    4 cloves garlic, crushed

  7. preheat your oven to 325 degrees
  8. Pinch your dough ball into a rough cock-and-balls shape and press it into your oiled novelty pan. A loaf pan will work, but you might consider splitting it in half and using two loaf pans; Bryanna also talks about using an oval clay cooker, but I've never tried.
  9. Try to get as much basting broth on the cock as possible, without spilling to much on the sides of the pan, and put it in the oven for about 4 hours, basting heavily every 1/2 hour or so. If you're using a loaf pan, just pour the basting broth in, and there's no need to reapply.
  10. If you have a novelty mold, flip out your roast onto a lightly oiled cookie sheet, baste heavily and put that bad boy back in for about another 2 hours, basting regularly. If you're using a loaf pan, just flip it.
  11. When its a little lighter than the one pictured below, it is done.

Delicious. If you make it the night before, it only takes about 15-20 minutes at 350 to reheat.

Sourdough Stuffing

Stuffing is self explanatory: toast the bread, saute the vegetables, combine and bake. It practically makes itself but breaking it down can't hurt.
You need:
4 carrots
4 stalks of celery
1 small onion
1/2-2/3 loaf sour dough (best if its a bit stale, bakery dumpsters often have a lot of this)
1 cup water, broth, or mushroom soaking liquid (from rehydrating dried mushrooms)
2 tsp sage
2 tsp garlic granules
1 tsp salt
1/2 tsp pepper
1/2 tsp cinnamon
1/2 tsp coriander
1/2 tsp allspice
olive oil for toasting and sauteing
  1. Preheat oven to 350 degrees
  2. Cube the bread, smaller is generally better, but its definitely a personal taste thing.
  3. Toss cubes on a cookie sheet with olive oil, and maybe a bit of salt and pepper.
  4. Toast until golden, stirring regularly, no more than 30 minutes.
  5. While your bread is toasting, dice your vegetables.
  6. In a large sauce pan, saute the onions with the salt and pepper, until they start to become translucent. (be sure to remove your bread from the oven)
  7. Add your carrots, and as they get to temperature add the celery.
  8. When your celery gets to temperature, add your other spices,
  9. When your mirepoix (vegetable mix) starts to become a bit tender, add the broth and stir until the broth is hot.
  10. Combine everything in a mixing bowl and toss to spread the juices around.
  11. Put it in a greased casserole, and bake for about 45 minutes at 350.
Do not expect leftovers

Mashed 'Tater Casserole
Or Casserole des Pommes de Terre au Rosemarin avec Duxelles Vegetalienne
Mashed potatoes are delicious, but dull; everyone loves them, but people are afraid of change and won't dare to tamper with tradition. Fuck that.

For the vegan Duxelles:
~1 pound of mushrooms
4-6 shallots
1 medium onion
5-6 cloves of garlic
2 tsp dry rosemary, measured then crushed (or 1 Tbl fresh rosemary, chopped)
1 tsp oregano
1 tsp sage
salt and pepper
~2 Tbl olive oil

For the 'Taters
~3-5 pounds potatoes
a handfull of rosemary
salt and pepper to taste
1/4 cup olive oil... don't judge me.
  1. Set a large pot of salted water on to boil, not too salty, you might want to use the cooking liquid.
  2. Preheat your oven to 375.
  3. Chop the potatoes into course chunks, and when the water boils drop 'em in.
  4. While yur 'taters are a-cookin', chop the onions, mushrooms, and shallots fine.
  5. In a medium saucepan heat some oil, then saute the shallots and onions with a bit of salt and pepper until they become transluscent. (remember to keep testing your 'taters for mashability)
  6. Add in your garlic, mushrooms and herbs, and continue to saute until the mushrooms are tender.
  7. Drain your 'taters, reserve liquid for gravy (if you wanna). Mash 'em with a little oil, and herbs. They're a lot thicker than your standard mashed taters, it's a good thing.
  8. Grease a 3 quart casserole (~13" x 9" x 2"), and put down a thick-ish (~.25"-.5") layer of 'tater, spread evenly.
  9. Cover that evenly with your duxelle (the shallot-mushroom-onion stuff)
  10. Repeat this process until the casserole is filled, make sure you've enough for a layer of 'tater on top.
  11. Drizzle the top with a little olive oil, or place a few chunks of coconut oil if you're feeling really decadent.
  12. Bake for about 45 minutes, or until the top has nice hints of gold.

Mashed potatoes don't know what they're missing.

Rainbow Chard
The queerest vegetable!

You need:
2 bunches of rainbow chard
6-12 cloves of garlic
1 large or 2 medium onions
1 tsp of sugar
a generous splash (~3 Tbl) of vinegar (apple cider or balsamic)
2 Tbl olive oil
salt and pepper
  1. Chop your onions and your chard into bite-sized bits. I separate the stems from the leaves 'cause they take a little longer to cook.
  2. In a medium-to-large-ish fry pan or wok, saute the onions in the olive oil with some salt and pepper.
  3. When the onions start to get translucent, add the chard stems and garlic.
  4. When those are to temperature, add your leaves, sugar and vinegar. Stir, cover, and turn the heat down to medium-low.
  5. Continue steaming for 5-10 more minutes, stirring fairly often. When the leaves start to get bright green, poor the pan's contents into a serving unit you can cover.
Heart-Shaped Biscuits
I used my general biscuit recipe, but I didn't have any coconut mylk on-hand so I used 1/4 cup hazlenut butter dissolved in 1 1/4 cups water (I also used more baking soda, I think ours gets less potent 'cause it sits out). I happened to have a heart-shaped cookie-cutter on hand, so I rolled out the dough roughly (if you mess with it too much it gets chewy, and hard) to about 3/4" thick and wiggled the cutter a little as I pressed so the sides wouldn't get all pinched together.

Food that is shaped like other things just tastes better.

Gravy

I doubled my gravy recipe, but I used olive oil and potato cooking liquid in place of water, which lends nutrition and nuance.

Cranberry Sauce
Like stuffing it practically makes itself; I like the stuff in a jar because it is novel, retro, and absurd, but tastewise, it can never compare to the homemade stuff; a hint of lemon and love make all the difference. Jesus I sound like fuckin' Martha Stewart... it's a good thing.

You Need:
1 cup some kind of juice (orange works great, water is fine, but you might want more sugar)
1 cup sucanat (or sweetener of your choice)
1 pound cranberries
a little cinnamon, ginger, nutmeg, and/or cloves
  1. Put all your ingredients in a pot, bring it to a boil, reduce it to a simmer.
  2. Let it simmer until all of the berries have exploded.
  3. Pour into a mold and allow it to cool before serving.

Monday, September 7, 2009

Lasagna


Vegan Lasagna. Easily one of my favorite foods, but making it is a bit of a time commitment (so. fucking. worth it.) , so be sure that you've budgeted a good couple of hours, or make your tofu ricotta, and saucey vegetables ahead of time.

More...

You will need:
  • Sacucy Goodness any jar of tomato sauce will do, and I made a vegan bechamel once that worked great for this
  • ~2 16oz packages of tofu (buy local, Surata is awesome)
  • Nutritional yeast
  • Garlic
  • Apple cider vinegar
  • Seasonal vegetables (I used sweet peppers, zucchini, and rainbow chard)
  • Mushrooms!

First, you chop your veggies:


The easiest way to stem in and seed your peppers, in my experience, is to halve them, then yank out their placenta with your bear hands. Its easier to use your fingers for this, I promise; your hands are the best tools you've got.


I like to halve my halves, halve those, then halve them once more. I like to use the verb halve, but this means cut them into sixteenth-strips if you find multiple fractions challenging.


Dice 'em up. I do them small so I can throw them in with the greens, if you overcook them they get bitter.


Decapitate your zucchini.


Halve them and cut them into little half moons; I do them thin so they cook fast.


Mushrooms take forever, so I like to dice 'em up real fine.


Run your knife down the sides of the chard stem to remove the leafy bits, which you'll chop seperately 'cuz they cook fast. Cut off the skinny tops of the stem, then cut the thick bits in half so you have spears of about the same width.


Dice up your stems kinda small, and halve your chard leaves and cut them into quarter inch by half leaf-width strips.


Sautee your mushrooms in a little olive oil over about medium heat, if you're using onion, add it here. Just sautee until they get a good brown, then add salt.


Throw in your zucchini moons, and your chard stems and let them get kinda soft (we're gonna bake 'em too, so don't make 'em mush just yet).


Toss in your chard and your peppers and bring them to temperature. This takes less than a minute.


Add in your saucy goodness until it just starts to get hot, then kill the heat.


Now press about 8 cloves of garlic in there; there's no such thing as too much.


Mash your tofu together, but don't use a spatula, it doesn't work. if you have a potato macher they work pretty well.


Season up your tofu with a little vinegar, nutritional yeast, salt, pepper, and if you have any, a little bit of miso makes it taste really good.


This is after we gave up on mashing with a spatula, and just blended it in the food processor; it was ok, but the texture was almost too smooth.


We were in a hurry so we added some water to the sauce and didn't boil the noodles. I reccomend at least soaking the noodles in warm water first. I put down a layer of noodles, spread on my tofu mix...


Add saucy veggies add more noodles and repeat.


On the top layer, just stop at the tofu mix step; we were running kinda low on noodles at this point.


Sprinkle some nutritional yeast on that.


And its ready to go into the oven. About an hour at 350. If your not boiling or saoking your noodles, I reccomend covering it with a lid or some foil.


It is important at this point that you dance to appease the lasagna goddesses. Neila is an athiest, but she was willing to indulge in the tradition for anthropological purposes.

Let it get all brown and awesome on top, like so.


Cut into cute little squares and eat quickly, or it will disappear.

UPDATE: Sean(Davenport) is the guestmouth for this blog and did a bunch of the footwork and was generally indespensible in the lasagna process, but I'm not linking to his blog because he was so snarky about it :-P. You're welcome.